

Popular
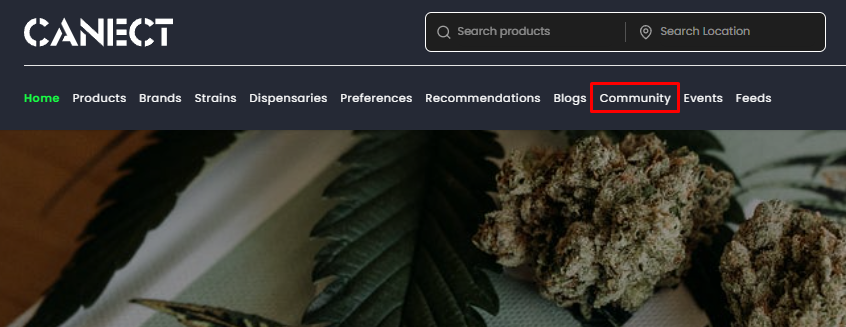
1. Navigate to the Community section
From the top navigation bar, select Community to view existing groups and access the community controls.
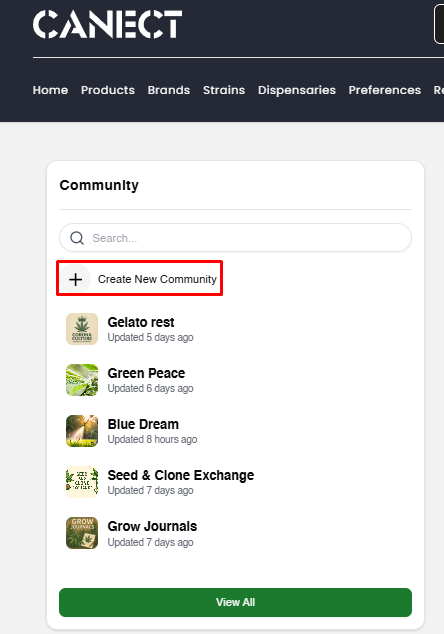
2. Click Create New Community
In the Community panel, click the Create New Community button to start setting up your own group.
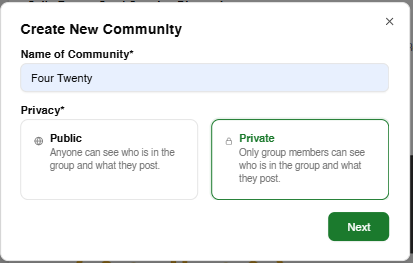
3. Enter the community name and set privacy
A dialog appears where you can:
-
-
Name your community: Choose a clear, searchable name (e.g., “Four Twenty”) so others can find it easily.
-
-
Select privacy:
-
Public – Anyone can see who’s in the group and what’s posted.
-
Private – Only members can see the group and its content.
-
Click Next when finished.
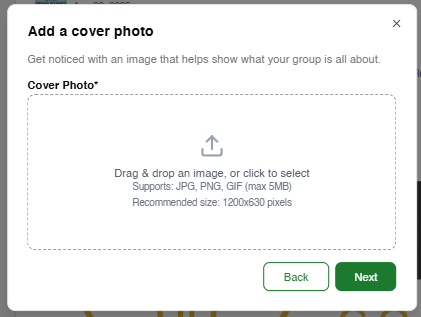
4. Add a cover photo
Choose a cover image that reflects your community’s purpose.
-
Drag and drop or click to upload a file (JPG, PNG, GIF up to 5 MB).
-
Recommended dimensions: 1200 × 630 pixels for best fit.
When ready, click Next.
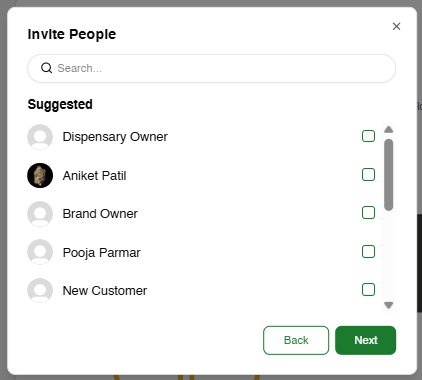
5. Invite people
Search by name or pick from the suggested list to add members.
-
Tick the checkbox next to each person you want to invite.
-
Click Next. You can always invite more people later.
6. Add a description
Give a brief overview of what your group is about so prospective members know the purpose, topics and any key rules.
-
Type your description.
-
Click Create to finish.

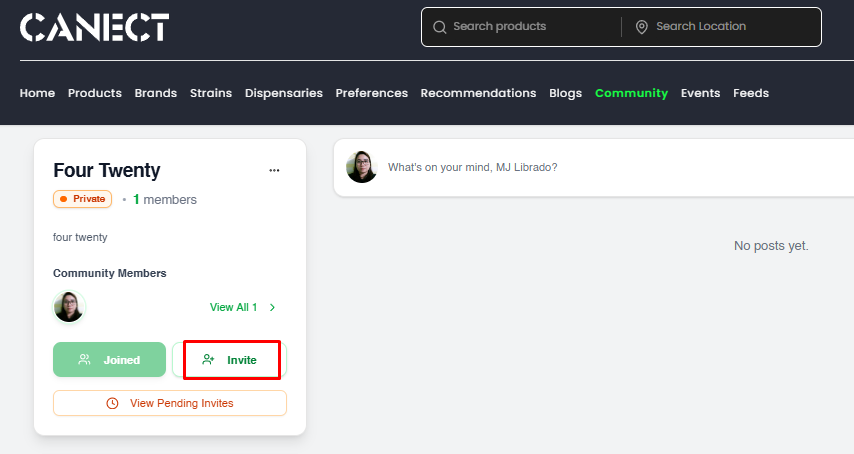
After creation
You’ll land on your new community page. From here you can:
-
Use Invite to add more members.
-
Select View Pending Invites to see outstanding invitations.
-
Post a welcome message, pin community rules and start events to engage members right away.
Tips & Best Practices
-
Name: Keep it specific and easy to search; avoid special characters.
-
Cover photo: Use high-contrast imagery and leave margins so important details aren’t cut off.
-
Description: Clearly state who the community is for, what’s allowed and any posting guidelines.
-
Privacy changes: Switching from Public to Private (or vice versa) will affect who can see your group—consider the impact before changing.
-
Moderation: Assign a moderator early and establish basic rules to ensure respectful interactions.
By following these steps, you’ll set up a welcoming and well‑structured community on Canect.